OX6:OX6-Upsell
Open-Xchange Server 6 Upsell Layer
Introduction
If you are looking for Upsell documentation for the AppSuite product line, please browse to AppSuite:Upsell
The Open-xchange Upsell packages provide the ability to show advertisements to an Open-Xchange user who is using a free for charge package like "Webmail" or "PIM". It gives hosting companies the possibility to take advantage of selling premium OX services (Mobility OXtender etc.) via "in app" technology.
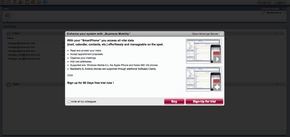
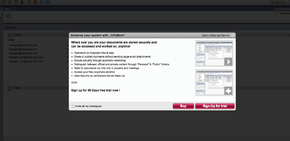
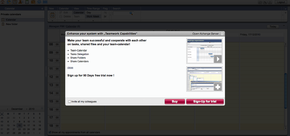
When a "freemail" user clicks on a feature like "Download Outlook Oxtender", "Enable Mobility" or wants to "Access Infostore" an Upsell Layer is shown where the user learns more about the missing functionality in form of text, screenshots and a video explaining the feature.
Based on the configuration the user can request a free trial of a package like "Premium Groupware" or / and can buy the package within the Upsell Dialogue with one simple click.
It is also possible for hosting companies to easily integrate their own online shop into the Open-Xchange Upsell Layer.
The customer never has to leave the application to upsell - it's a native IN APP upsell.
We have implemented 3 different types how to process the upsell an user is requesting in the hosters backend:
- Show the Upsell Layer window and trigger the upgrade via a generated email to an email address after user clicked "buy" or "trial".
In this email there is the information which user from which contaxt wants to upgrade to which package. After receiving the email the hoster's sales team can put the customer into billing.
- Show the Upsell Layer window and open a configurable URL including all needed parameters after the user clicked "buy" or "trial.
This is the perfect automated way if the hoster wants to have a full automated upsell which he can easily integrate into his existing provisioning & billing system.
- Directly display a configurable URL/Online SHOP (systemwide or/and per context configurable) within the upsell Layer window instead of standard OX upsell content.
This is the perfect automated way for all hosters which have an online shop in place and wants to use it for the upsell, too.
The upsell layer has full i18n (EN and DE are included) support integrated and offers following components for advertisement:
- Text
- Video
- Screenshots
to promote a certain feature for Open-Xchange.
The important part of the upsell layer is the ability to pass all needed parameters from users session like username,id,cid etc. + the feature he wants to buy, to a third party online shop system or send these parameters via email in machine readable (configurable) format to a dedicated mailsystem which can process it via procmail or similar to trigger the upgrade process via the Open-Xchange API´s (SOAP,RMI,CLT).
To implement different Upsell layers for different "brands" or "resellers", you can also set all the below listed properties per "brand". If you need information how to define and use "brands" in Open-Xchange, please have a look at the branding info page here CCBranding . It is a powerful way to have multiple "brands" in one single installation.
Install on OX {{#if:|{{{version}}}| AppSuite}}
Debian GNU/Linux 10.0
Add the following entry to /etc/apt/sources.list.d/open-xchange.list if not already present:
deb https://{{#if:%7C{{{ldbaccount}}}@%7C}}software.open-xchange.com/{{#if:%7C{{{toplevel}}}%7Cproducts}}/updates/DebianBuster/ /{{#if:||
# if you have a valid maintenance subscription, please uncomment the
# following and add the ldb account data to the url so that the most recent
# packages get installed
# deb https://[CUSTOMERID:PASSWORD]@software.open-xchange.com/{{#if:|{{{toplevel}}}|products}}/updates/updates/DebianBuster/ /
}}
and run
$ apt-get update
$ apt-get install open-xchange-upsell-multiple open-xchange-upsell-multiple-gui
Debian GNU/Linux 11.0
Add the following entry to /etc/apt/sources.list.d/open-xchange.list if not already present:
deb https://{{#if:%7C{{{ldbaccount}}}@%7C}}software.open-xchange.com/{{#if:%7C{{{toplevel}}}%7Cproducts}}/updates/DebianBullseye/ /{{#if:||
# if you have a valid maintenance subscription, please uncomment the
# following and add the ldb account data to the url so that the most recent
# packages get installed
# deb https://[CUSTOMERID:PASSWORD]@software.open-xchange.com/{{#if:|{{{toplevel}}}|products}}/updates/updates/DebianBullseye/ /
}}
and run
$ apt-get update
$ apt-get install open-xchange-upsell-multiple open-xchange-upsell-multiple-gui
Installation on Open-Xchange v6.22.x
Debian GNU/Linux 6.0
Add the following entry to /etc/apt/sources.list if not already present:
deb http://software.open-xchange.com/OX6/6.22/6.22.0/backend/DebianSqueeze/all/
and run
$ apt-get update
$ apt-get install open-xchange-upsell-multiple open-xchange-upsell-multiple-gui
SUSE Linux Enterprise Server 11
Add the package repository using zypper if not already present:
$ zypper ar http://software.open-xchange.com/OX6/6.22/6.22.0/backend/SLES11 ox
and run
$ zypper ref
$ zypper in open-xchange-upsell-multiple open-xchange-upsell-multiple-gui
RedHat Enterprise Linux 6
Start a console and create a software repository file if not already present:
$ vim /etc/yum.repos.d/ox.repo
[ox]
name=Open-Xchange
baseurl=http://software.open-xchange.com/OX6/6.22/6.22.0/backend/RHEL6/
gpgkey=http://software.open-xchange.com/oxbuildkey.pub
enabled=1
gpgcheck=1
metadata_expire=0m
and run
$ yum update
$ yum install open-xchange-upsell-multiple open-xchange-upsell-multiple-gui
CentOS 6
Start a console and create a software repository file if not already present:
$ vim /etc/yum.repos.d/ox.repo
[ox]
name=Open-Xchange
baseurl=http://software.open-xchange.com/OX6/6.22/6.22.0/backend/RHEL6/
gpgkey=http://software.open-xchange.com/oxbuildkey.pub
enabled=1
gpgcheck=1
metadata_expire=0m
and run
$ yum update
$ yum install open-xchange-upsell-multiple open-xchange-upsell-multiple-gui
After Installation
After installation of these packages, you have installed one server side plugin and one gui-plugin. If you have dedicated apaches running in your setup, only install the "open-xchange-upsell-multiple-gui" package on them. The upsell layer is now available to ALL contexts/users of this OX application server/gui instance. All UI plugin contents are installed under following directory (on Debian based installations):
/var/www/ox6/plugins/com.openexchange.upsell.multiple.gui/
It contains different subdirectories, for example:
css - All colors, styles are defined within this directory.
lang - All translated PO files must be stored below this directory.
templates - If you want to change/replace screenshots, videos, layouts etc. check this directory.
The server side plugin comes with some templates, for example to change the advertisement text which is sent to the user, or the mail which is sent to the upgrade processing email system. All of them are stored below /opt/open-xchange/etc/groupware
upsell_mail_body_ox_enduser.tmpl
upsell_mail_body_ox_enduser.tmpl_de_DE
upsell_mail_subject_ox_enduser.tmpl
upsell_mail_subject_ox_enduser.tmpl_de_DE
Configuration
Once installed, all necessary configuration can be done in one single file. This file can be found at the following directory on the OX application server:
/opt/open-xchange/etc/groupware/upsell.properties
Switching between the 3 different types of the upsell layer, edit parameter:
com.openexchange.upsell.multiple.method=
Possible values: "direct", "static" or "email".
direct = Redirect within IFRAME immediately to parameter "com.openexchange.upsell.multiple.method.static.shop_redir_url" or to the context specific URL value after clicking one of the upsell triggers.
static = Redirect AFTER clicking a button within the shipped OX Upsell pages to parameter "com.openexchange.upsell.multiple.method.static.shop_redir_url" or to the context specific URL value after clicking one of the upsell triggers.
email = Send email to specific address AFTER clicking a button within the shipped OX Upsell pages
Defining the redirect URL for method "static" and "direct" for all contexts which are not specially provisioned, edit parameter:
com.openexchange.upsell.multiple.method.static.shop_redir_url=
Example:
http://shop.host.tld/store?src=ox&user=_USER_&userid=_USERID_&mail=_MAIL_&login=_LOGIN_&imaplogin=_IMAPLOGIN_&clicked_feat=_CLICKED_FEATURE_&lang=_LANG_&cid=_CID_
As you can see from the example, the server side upsell plugin will replace all placeholders (_USER_ , _USERID_ etc.) with the data from the users OX session while he is logged into OX. You can use following parameters in this URL:
"_USER_"
"_USERID_"
"_MAIL_"
"_LOGIN_"
"_IMAPLOGIN"
"_CLICKED_FEATURE_"
"_UPSELL_PLAN_" - Not in use.
"_CID_"
"_LANG_"
"_PURCHASE_TYPE_" - Only used if email or static method is used due to the OX upsell layout/buttons
"_INVITE_" - User checked "invite my friends" checkbox in upsell box
If you need a different URL than specified in this configuration for one or more OX Contexts, you must set the custom attribute:
"com.openexchange.upsell/url"
into the admin user of the context via SOAP,RMI OR Commandline Tools.
WARNING: Due to Database restriction, you can only set the URL without any PAR AMETERS. PLEASE ONLY SET THE HOST+PATH to your WEBAPP.
Following PARAMETERS will be automatically appended to the URL:
src=ox&user=_USER_&invite=_INVITE_&mail=_MAIL_&purchase_type=_PURCHASE_TYPE_&login=_LOGIN_&imaplogin=_IMAPLOGIN_&clicked_feat=_CLICKED_FEATURE_&upsell_plan=_U
PSELL_PLAN_&cid=_CID_&lang=_LANG_
To set the custom attribute via Commandline Tools, use following example:
changeuser -i 2 -c 424242667 --com.openexchange.upsell/url="http://my.reseller1.com/path/to/webapp/or/php_page.php?"
Defining the email address where upsell plugin will send all infos to for processing this request in a machine readable format:
com.openexchange.upsell.multiple.method.email.address=
The mail will be send to this email address. It should be processed by some script via procmail or similar to trigger an API call later on.
Email template to load for sending the machine readable mail, if not found, hardcoded text will be used:
com.openexchange.upsell.multiple.method.email.template=/opt/open-xchange/etc/groupware/upsell_mail_body.tmpl
All needed paramaters can be included in this email. You can use same placeholders as in the "REDIRECT URL", which is explained above.
Defining email subject to use when sending upsell request mails. See available placeholder above:
com.openexchange.upsell.multiple.method.email.subject=
If you like, the upsell plugin can also send an info/advertisement email to ox enduser to inform about upsell after the machine readable mail was sent:
com.openexchange.upsell.multiple.method.email.oxuser.enabled=
Defining email template to load for ox enduser, if mail to enduser is configured:
com.openexchange.upsell.multiple.method.email.oxuser.template=
If you need i18n support within email templates, create template with suffix "_<LANGUAGE_CODE>" . Example: /var/upsell_mail_body_ox_enduser.tmpl_de_DE
If you want to use the builtin upgrade methods, you must also configure the OX RMI API informations:
com.openexchange.upsell.multiple.rmi.host=
com.openexchange.upsell.multiple.rmi.masteradmin=
com.openexchange.upsell.multiple.rmi.masteradmin.pass=
Adding new feature (e.g. video, screenshot)
- Open register.js (located in gui folder)
- Search for upsell.config.features
- add the following code ( description inline )
featurename: {
  name: ["trigger element"],
  title: _("upsell window title"),
  product_name: _("feature headline"),
  intro: _("upsell description text"),
  list: {
    list_item_1:  _("enumeration"),
    list_item_2:  _("enumeration"),
    list_item_3:  _("..."),
  },
  outro: _("upsell text that shows at end"),
  videos: {
    video_1: {
      thumb: "name_of_video_thumbnail.png",
      video: "name_of_video_file.swf"
    }
  },
  images: {
    image_1: {
      thumb: "name_of_image_thumbnail.png",
      image: "name_of_lightbox_image.png"
    }
  },
  buttons: {
    trial: {
      content: _("buttonlabel"),
      action: "put javascript actions here if any"
    },
  },
  checkboxes: {
    invite:{
      content: _("checkboxlabel"),
      action: "put javascript actions here if any"
    }
  }
},
- after the feature is implemented you should create the nessacarry files and place them as follow
-templates
--_featurename
---- language ( for example de_DE )
-------- flash ( for videos )
-------- img ( for images )
Load required js/cs files
- to load additional files open register.js and add the following code
upsell = {
  files: {
    jss: {
      name: {
        script: "name.js",
      },
    },
   css: {
     name: "name.css",
   },
 },
}
- add name.js to jss/name.js
- add name.css to css/name.css
Change look and feel (e.g. branding, colors and sizes)
- you should edit the existing css located in /var/www/ox6/plugins/com.openexchange.upsell.multiple.gui/css/upsell.css
- you can add / edit background in /var/www/ox6/plugins/com.openexchange.upsell.multiple.gui//img
Possible triggers
modules/calendar/freebusy
modules/calendar/team
modules/calendar/mini_calender
modules/calendar/new/add_participants
modules/calendar/new/remove_participants
modules/calendar/new/add_attachment
modules/calendar/new/delete_attachment
modules/contacts/new/add_attachment
modules/contacts/new/delete_attachment
modules/contacts/social/refresh
modules/contacts/social/publish
modules/mail/save_to_infostore
modules/infostore/send_as_attachment
modules/infostore/send_as_link
modules/infostore/mail/save_to_infostore
modules/infostore/social/refresh
modules/infostore/social/publish
modules/tasks/new/add_participants
modules/tasks/new/remove_participants
modules/tasks/new/add_attachment
modules/tasks/new/delete_attachment
configuration/mail/accounts/new
modules/folders/users

modules/infostore
modules/calender
modules/contacts
modules/mail
modules/portal
modules/tasks
modules/configuration

modules/outlook
modules/outlook.updater
modules/mobility


