PA OXaaS APSv2 User Guide
Contents
User Guide for the OX as a Service APSv2 package into Parallels Automation
This guide describes the integration for the OX as a Service APSv2 package into Parallels Automation. This guide describes all the tasks administrators can carry out from the Customer Control Panel.
This guide is intended for administrators who intend to manage the services provided by Open-Xchange.
Terms and Abbreviations
Below is the list of concepts and abbreviations you will find in this page.
| Abbreviation | Definition |
| API | Application Programming Interface |
| APS | Application Packaging Standard, an open standard that was designed to simplify the delivery of SaaS applications in the cloud-computing industry. |
| CCP | Customer Control Panel |
| PA | Parallels Automation, which includes both POA and PBA. |
| PBA | Parallels Business Automation. |
| POA | Parallels Operations Automation. |
| SaaS | Software as a Service. |
Customer Control Panel
In the Customer Control Panel (CCP) you can manage all the Open-Xchange settings.
User’s Tab
From this tab you can add, manage and delete service users registered within the current subscription.
- To add a user click on Add New Service User.

- Fill in all the fields and click on Next.
- User photo: you can upload a photo to add to your profile.
- Display name: enter the display name you wish to have.
- Login: choose a login name and select your domain from the dropdown list.
- Password: choose your password. (You may also click Generate Password to create one automatically and you will see it under the Password field).
- Confirm password: reenter your password.
- Tick the Open-Xchange service checkbox.

- A summary of the user information will appear. Click Finish for confirmation.

- You can then see that the status of the user will be


OX App Suite2 Tab
From the Open-Xchange tab you can purchase requests and manage users, groups, resources, domains and purchase requests.
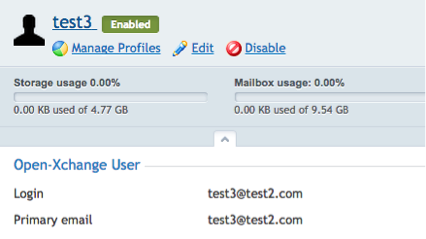
Users
On this tab you can add new users, manage profiles and edit, enable and disable them.
By default you will see the Active view, where you can see each user’s status. There are three different possibilities: ![]()
![]()
![]()

You may also wish to see the Classic view by clicking ![]() and selecting “Classic list”:
and selecting “Classic list”:
Add New User
To add a new user:
- Click Add New User.
- Fill in the following fields:
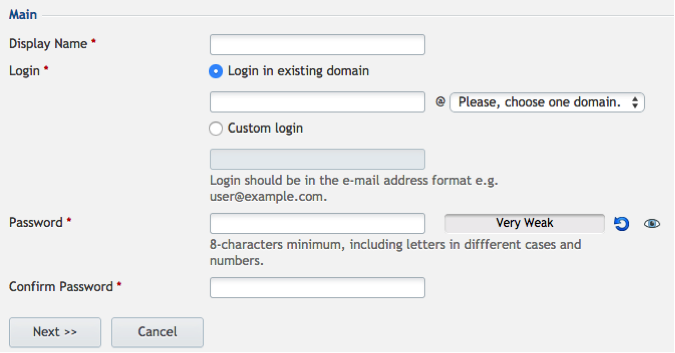
- Click Next.
- The status will appear as
 . If an error occurs during creation, the status will be
  .
.

Manage Profiles
To manage profiles, follow these steps:
- Select the user whose profile you want to manage and then click Manage Profiles.
- Select the new profile you want to assign to a user from the drop-down list.
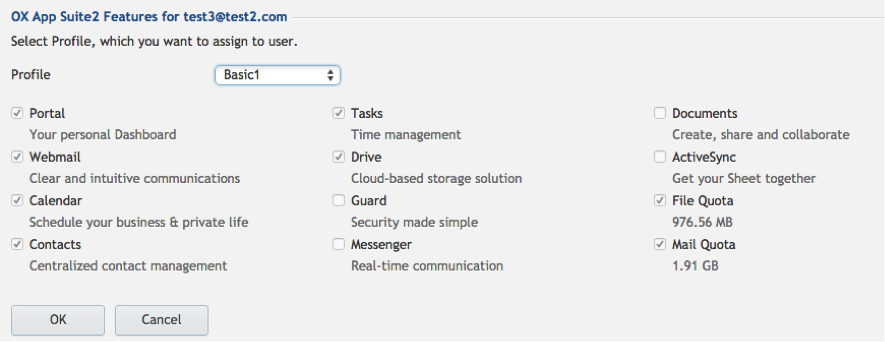
- Click OK to save the changes.


Edit
- Select the user whose profile you want to edit and then click Edit.

- Enter the alias and select the appropriate domain from the drop-down list.
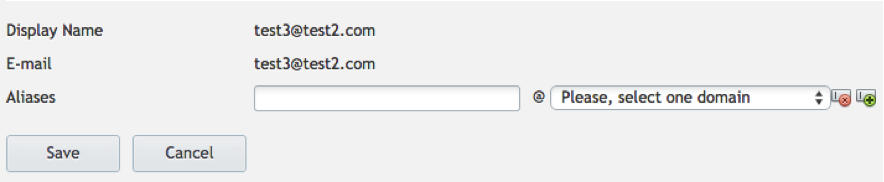
- Click Save.


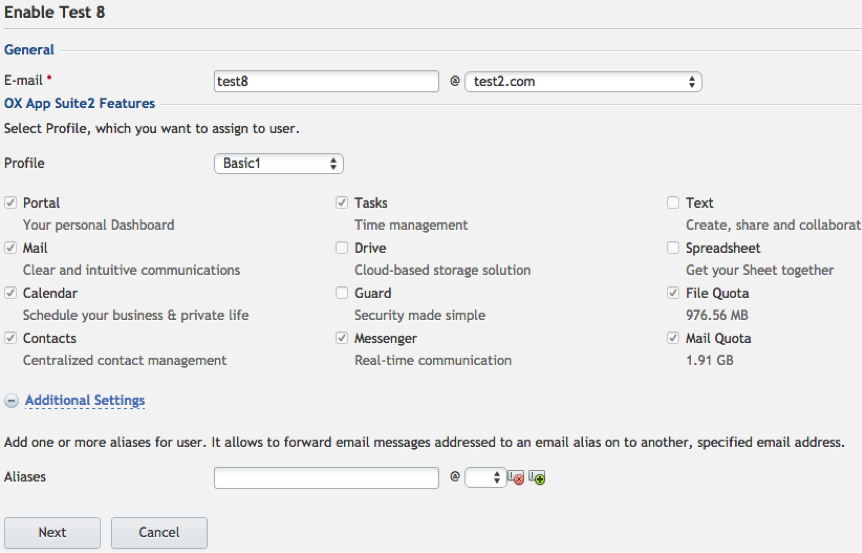
Enable
To populate the service user information to Open-Xchange:
- Select the user whose profile you want to enable and then click Enable OX App Suite2.
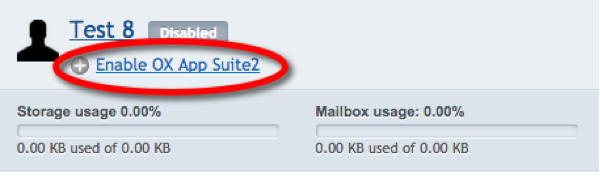
- Enter the email and choose the domain, then select the profile you want to assign to the user. You can also add one or more aliases to the user by clicking on Additional Settings.