Difference between revisions of "OX6:Gui Theming Description"
| Line 1: | Line 1: | ||
| − | + | = Introduction = | |
| − | Open-Xchange | + | The Open-Xchange application allows you to create your own theme with your own colors and images. This tutorial will explain each step to create such theme. |
| − | == | + | == Tools == |
| + | |||
| + | A good tool for testing, debugging and experimenting is the Firefox plug-in Firebug. This powerful plug-in can help you to debug your CSS elements on the fly. You also require a image manipulation program like Photoshop, Gimp or Corel Draw. | ||
| + | |||
| + | == Understanding CSS == | ||
| + | |||
| + | The full layout of each Open-Xchange theme consists of two major parts: the CSS elements (90%) and the layout images (10%). This means, most of the theme is done in CSS. The main structure of the Open-Xchange frontend is done in HTML and combined with a CSS theme and a set of images completes the theme. The CSS elements control the look, size, position and sometimes the effect of a HTML element. If you want to change these attributes of a HTML element, you only need to define a class within you CSS file for this given HTML element. In this class, you can set the color, the size, the position and sometimes the effect of one or more HTML elements. | ||
| + | |||
| + | Some HTML elements have a fixed group of attributes which are set in a CSS file which is not part of the Open-Xchange theme. These fixed parts are required to make the layout work correct. However, you can always override these attributes in your CSS file if you want to or if you need to. | ||
| + | |||
| + | == Where to start == | ||
All themes will be stored in the following directory of the Open-Xchange Server: | All themes will be stored in the following directory of the Open-Xchange Server: | ||
| Line 9: | Line 19: | ||
/var/www/ox6/themes/ | /var/www/ox6/themes/ | ||
| − | Per default you will have at least | + | Per default you will have at least two themes in this directory: a default theme and a alternative theme. The easiest way to start with your own theme is to copy the default theme with: |
cp -r /var/www/ox6/themes/default /var/www/ox6/themes/[YOUR_THEME_NAME] | cp -r /var/www/ox6/themes/default /var/www/ox6/themes/[YOUR_THEME_NAME] | ||
| − | Now, you should start modifying your theme, by editing the stylesheet files in /var/www/ox6/themes/[YOUR_THEME_NAME]/css, and exchanging the images from /var/www/ox6/themes/[YOUR_THEME_NAME]/images. The following screenshots will give you an overview of the stylesheet structure, and which tags have to be modified in order to get your theme customized: | + | Now, you should start modifying your theme, by editing the stylesheet files in /var/www/ox6/themes/[YOUR_THEME_NAME]/css, and exchanging the images from /var/www/ox6/themes/[YOUR_THEME_NAME]/images. The following screenshots will give you an overview of the stylesheet structure, and which tags have to be modified in order to get your theme customized |
| + | |||
| + | = Version 6.18.2 (Still in progress) = | ||
| + | |||
| + | == Setup description == | ||
| + | |||
| + | After you have created your theme, you should make this theme available in the configuration interface for users of the Open-Xchange Server. To do that, you only have to manifest your theme in the following server configuration file, afterwards your users can select your theme: | ||
| + | |||
| + | groupware/settings/themes.properties | ||
| + | |||
| + | You will find at least two already existing themes there. Just add your new theme. We call our new theme "Mantis" which is also the path within the theme folder of the GUI. | ||
| + | |||
| + | modules/themes/mantis=Mantis | ||
| + | |||
| + | Afterwards, restart the Open-Xchange service groupware. Your users can now select your theme. | ||
| + | |||
| + | == Getting started, the background and the shadow == | ||
| + | |||
| + | Lets start with the basics, the background and the shadows. Open the global.css and change the background color: | ||
| + | |||
| + | body { | ||
| + | '''background-color: #26221D;''' | ||
| + | font-family: Arial, Helvetica, sans-serif; | ||
| + | font-size: 9pt; | ||
| + | color:#000; | ||
| + | } | ||
| + | |||
| + | Save the file and reload your theme. | ||
| + | |||
| + | [[Image:Background_theming.png|thumb|150px|none|Background]] | ||
| + | |||
| + | In this screenshot, you can see that the background is now darker but the corners of the subwindows are still blue. These blue elements are images which provide the shadow of the subwindows. | ||
| + | |||
| + | == Branding, get your logo into the frontend == | ||
| + | |||
| + | The new version 6.18.2 comes without a branding icon or logo in the upper area like in version 6.18.1 and earlier versions. To get a logo back into the top area just follow this small tutorial. | ||
| + | |||
| + | 1. Go to your theme folder e.g. themes/${name}/css/ | ||
| + | |||
| + | 2. Expand the file "concat.cssz" using gzip: "gzip -d -S .cssz concat.cssz" | ||
| + | |||
| + | 3. Open the file "concat" using a text editor (e.g. vim concat) | ||
| + | |||
| + | 4. Search for the tag '#branding'. | ||
| + | Please note: Further details how-to enable the logo or how to change | ||
| + | the height of the logo area, can be found in the comments. | ||
| + | |||
| + | 5. After editing the file, save your work and compress it again: | ||
| + | "gzip -S .cssz concat" | ||
| + | |||
| + | '''To test your modifications, clear your browser cache and hit the reload button of your browser.''' | ||
| + | |||
| + | Please note: | ||
| + | You will have to re-apply these changes on each update you install. | ||
| + | |||
| + | = Version 6.18.0 and lower = | ||
== Style == | == Style == | ||
| − | Open the Open-Xchange | + | Open the Open-Xchange CSS files for this changes. |
=== The Portal Page === | === The Portal Page === | ||
Revision as of 13:20, 22 December 2010
Introduction
The Open-Xchange application allows you to create your own theme with your own colors and images. This tutorial will explain each step to create such theme.
Tools
A good tool for testing, debugging and experimenting is the Firefox plug-in Firebug. This powerful plug-in can help you to debug your CSS elements on the fly. You also require a image manipulation program like Photoshop, Gimp or Corel Draw.
Understanding CSS
The full layout of each Open-Xchange theme consists of two major parts: the CSS elements (90%) and the layout images (10%). This means, most of the theme is done in CSS. The main structure of the Open-Xchange frontend is done in HTML and combined with a CSS theme and a set of images completes the theme. The CSS elements control the look, size, position and sometimes the effect of a HTML element. If you want to change these attributes of a HTML element, you only need to define a class within you CSS file for this given HTML element. In this class, you can set the color, the size, the position and sometimes the effect of one or more HTML elements.
Some HTML elements have a fixed group of attributes which are set in a CSS file which is not part of the Open-Xchange theme. These fixed parts are required to make the layout work correct. However, you can always override these attributes in your CSS file if you want to or if you need to.
Where to start
All themes will be stored in the following directory of the Open-Xchange Server:
/var/www/ox6/themes/
Per default you will have at least two themes in this directory: a default theme and a alternative theme. The easiest way to start with your own theme is to copy the default theme with:
cp -r /var/www/ox6/themes/default /var/www/ox6/themes/[YOUR_THEME_NAME]
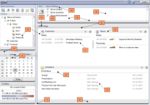
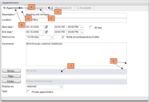
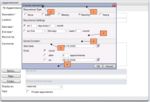
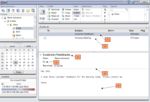
Now, you should start modifying your theme, by editing the stylesheet files in /var/www/ox6/themes/[YOUR_THEME_NAME]/css, and exchanging the images from /var/www/ox6/themes/[YOUR_THEME_NAME]/images. The following screenshots will give you an overview of the stylesheet structure, and which tags have to be modified in order to get your theme customized
Version 6.18.2 (Still in progress)
Setup description
After you have created your theme, you should make this theme available in the configuration interface for users of the Open-Xchange Server. To do that, you only have to manifest your theme in the following server configuration file, afterwards your users can select your theme:
groupware/settings/themes.properties
You will find at least two already existing themes there. Just add your new theme. We call our new theme "Mantis" which is also the path within the theme folder of the GUI.
modules/themes/mantis=Mantis
Afterwards, restart the Open-Xchange service groupware. Your users can now select your theme.
Getting started, the background and the shadow
Lets start with the basics, the background and the shadows. Open the global.css and change the background color:
body {
 background-color: #26221D;
 font-family: Arial, Helvetica, sans-serif;
 font-size: 9pt;
 color:#000;
}
Save the file and reload your theme.
In this screenshot, you can see that the background is now darker but the corners of the subwindows are still blue. These blue elements are images which provide the shadow of the subwindows.
Branding, get your logo into the frontend
The new version 6.18.2 comes without a branding icon or logo in the upper area like in version 6.18.1 and earlier versions. To get a logo back into the top area just follow this small tutorial.
1. Go to your theme folder e.g. themes/${name}/css/

2. Expand the file "concat.cssz" using gzip: "gzip -d -S .cssz concat.cssz"

3. Open the file "concat" using a text editor (e.g. vim concat)

4. Search for the tag '#branding'.
 Please note: Further details how-to enable the logo or how to change
 the height of the logo area, can be found in the comments.

5. After editing the file, save your work and compress it again:
 "gzip -S .cssz concat"

To test your modifications, clear your browser cache and hit the reload button of your browser.

Please note:
You will have to re-apply these changes on each update you install.
Version 6.18.0 and lower
Style
Open the Open-Xchange CSS files for this changes.
The Portal Page
- <body> .background-color
- cpbottom-color
- font-color-disabled
- font-style-headline
- background-color-additional-content
- border-background-default
- font-color-default
- font-style-lable
- font-color-header
- cpheader-color
- font-style-headline
- border-color-design
- background-color-content
- font-color-header
- topHeaderBG
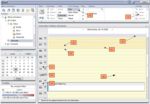
The Calendar Page
- font-color-disabled
- wholeDayBackground
- background-color-PMG-selection-elements
- offTimeBackground
- strokeCalendar
- sectionStrokeCalendar
- border-color-image
- font-style-big-headline
- kwSeperationBackGround
- workTimeBackground
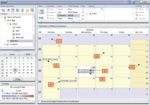
Calendar Month View
- wholeDayBackground
- appointmentTEMPORARY
- appointmentRESERVED
- appointmentABSENT
- appointmentFREE
- workTimeBackground
- offTimeBackground
New Appointment
- background-color-additional-content
- font-color-disabled
- border-color-design
- border-color-content-default
- background-color-content
- font-style-lable
- background-color-default
New Appointment Series
- popupHeaderBackground
- popup-header
- greywrapper
- background-color-additional-content
- border-color-design
- popupBackground
Calendar Week View
- border-color-design
- font-style-low
Mail View
- selected
- tr
- font-style-big-headline
- font-style-lable
- border-color-design
- defaultContainer
Setup description
After you have created and modified your theme, you should make those theme available in the configuration interface for users of the Open-Xchange Server. To do that, you only have to manifest your theme in the following server configuration file, afterwards your users can select your theme:
/opt/open-xchange/etc/groupware/settings/themes.properties
Each key in this property file must be prefixed with the theme bundle identifier. This is "com.openexchange.themes". The prefix must be followed with the unique identifier of a theme. This unique identifier specifies the directory name of the theme on the web server (/var/www/ox6/themes/ per default), too. The value of the property can be any name to described the theme. This name will be displayed in the AJAX GUI for selecting a theme. For example you should add the following line to this configuration file:
com.openexchange.themes.[YOUR_THEME_NAME]=[YOUR_THEME_DESCRIPTION]
Afterwards, restart the Open-Xchange service groupware. Your users can now select your theme.
End user view
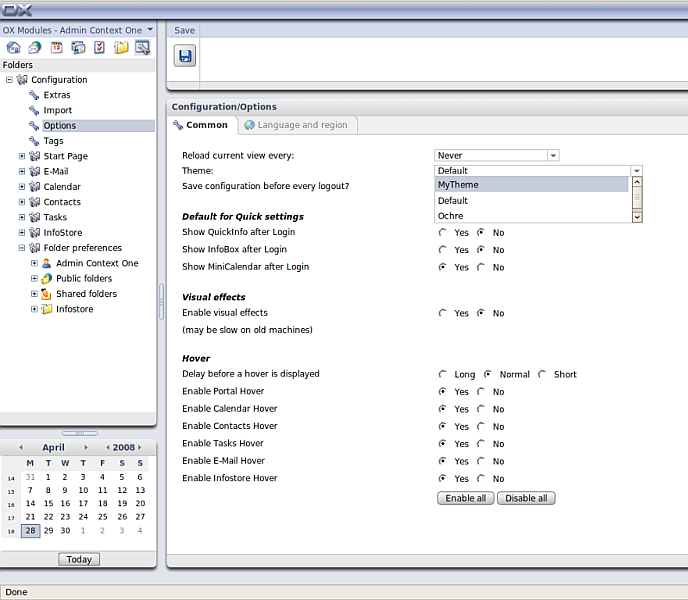
After you have created and configured your theme, your users will be able to select it in the configuration frontend:
