Difference between revisions of "PA OXaaS APSv2 Deployment Guide"
(→Preparing the Endpoint Host Server) |
|||
| (18 intermediate revisions by 3 users not shown) | |||
| Line 1: | Line 1: | ||
= Deployment Guide for the OX as a Service APSv2 package into Odin Service Automation = | = Deployment Guide for the OX as a Service APSv2 package into Odin Service Automation = | ||
| − | This APS 2.0 package is only for the Open-Xchange own OXaaS platform or similar respective compatible deployments or copies of this platform. The package is designed for syndication and on-premise customers with Odin Service Automation | + | This APS 2.0 package is only for the Open-Xchange own OXaaS platform or similar respective compatible deployments or copies of this platform. The package is designed for syndication and on-premise customers with Odin Service Automation 6.0.4 and higher. |
This guide describes the integration for the OX as a Service APSv2 package into Odin Service Automation. This guide is intended for providers that use Odin Service Automation and want to sell Open-Xchange services to customers. | This guide describes the integration for the OX as a Service APSv2 package into Odin Service Automation. This guide is intended for providers that use Odin Service Automation and want to sell Open-Xchange services to customers. | ||
| Line 60: | Line 60: | ||
|'''Definition''' | |'''Definition''' | ||
|- | |- | ||
| − | | | + | |Open-Xchange-xxxx.app.zip Package |
|Open-Xchange is the name of the package and xx-xx is the placeholder for a specific version of the APS | |Open-Xchange is the name of the package and xx-xx is the placeholder for a specific version of the APS | ||
|- | |- | ||
|Foldername | |Foldername | ||
| − | |Name of the folder where a specific file is located. In this case, | + | |Name of the folder where a specific file is located. In this case, “open-xchange” |
|- | |- | ||
| − | |https://endpoint- | + | |https://endpoint-ip-or-dns |
|IP or URL of the environment | |IP or URL of the environment | ||
|- | |- | ||
| Line 75: | Line 75: | ||
=== About Open-Xchange=== | === About Open-Xchange=== | ||
The standard business model of Open-Xchange consists of two major components: a platform fee and a revenue share. With the platform fee the customer pays the basic access to the hosted service or the software and it usually includes a certain amount of basic packages that are ideally distributed to a wide audience of users by bundling them into other products. | The standard business model of Open-Xchange consists of two major components: a platform fee and a revenue share. With the platform fee the customer pays the basic access to the hosted service or the software and it usually includes a certain amount of basic packages that are ideally distributed to a wide audience of users by bundling them into other products. | ||
| + | |||
| + | == Technical Overview == | ||
| + | |||
| + | This section contains an outline of how the integration of Open-Xchange and PA is performed and the list of Open-Xchange features that are supported within the integration package. | ||
| + | |||
| + | === Supported Architecture and Requirements === | ||
| + | |||
| + | ==== The Principle of OSA & APS 2 ==== | ||
| + | |||
| + | The usual way that users use Odin, in order to get OX App Suite, is as follows: | ||
| + | |||
| + | # Open-Xchange published an APS 2 package into the Odin catalogue/ecosystem. | ||
| + | # Odin customers, and service resellers, see the package and want to resell OX App Suite. | ||
| + | # The service resellers downloads the APS 2 package and installs it into their OSA system | ||
| + | # The OSA system will ask for the location of a running and compliant OX App Suite System (This can be OXaaS or a compliant in-house OX App Suite System) | ||
| + | # The reseller can then sell OX App Suite accounts. | ||
| + | |||
| + | ==== Compliant OX App Suite System ==== | ||
| + | |||
| + | There are two options to connect an OX App Suite system: | ||
| + | # Use the OXaaS service that is provided by Open-Xchange | ||
| + | # Use an on-premise installation that includes a complete OX App Suite system, a Dovecot mail system and all the related services. | ||
| + | |||
| + | Use the standard recommend components together with provided configurations for: | ||
| + | * Apache | ||
| + | * Mysql | ||
| + | * Openldap (with a dedicated Open-Xchange schema) | ||
| + | * HAproxy | ||
| + | * Postfix | ||
| + | * S3 compatible Objectstore (as a file/email backend) | ||
| + | |||
| + | Please refer to following high level architecture diagram and if you have any questions please contact sales@open-xchange.com | ||
| + | |||
| + | [[Image:Odin_Architecture.png]] | ||
| + | |||
| + | == Download == | ||
| + | |||
| + | === APS package === | ||
| + | |||
| + | Download the APS package from the APS catalog: http://dev.apsstandard.org/apps/2.0/Open-Xchange/Open-Xchange/Mamasu/ | ||
| + | |||
| + | === Open-Xchange === | ||
| + | |||
| + | Please contact Open-Xchange for further download and configuration information via info@open-xchange.com. | ||
== Integration Prerequisites == | == Integration Prerequisites == | ||
| Line 82: | Line 126: | ||
=== Prerequisites for the OSA Platform === | === Prerequisites for the OSA Platform === | ||
| − | The APS Package | + | The APS Package requires POA v6.0.4 or higher and OX App Suite 7.8.0 or higher. |
| + | |||
| + | PBA upsell APS must be enabled (to install it, follow this link: https://doc.apsstandard.org/2.1/pa/upsell/deploy/) | ||
=== Prerequisites for the Endpoint === | === Prerequisites for the Endpoint === | ||
| Line 98: | Line 144: | ||
* PHP >= 5.3.3 | * PHP >= 5.3.3 | ||
* aps_php_runtime >= 2.1-292 | * aps_php_runtime >= 2.1-292 | ||
| − | |||
| − | |||
| − | |||
| − | |||
|- | |- | ||
|} | |} | ||
| Line 109: | Line 151: | ||
Open-Xchange APS Package requires an application host server to be set up before it can be successfully imported and used in OSA. This endpoint server can be provisioned as a VPS or a VM in the same infrastructure as OSA systems. Please make sure you have OSA (POA + PBA) infrastructure set up properly before continuing. The Provider’s guide for setting up OSA can be found at http://download.pa.parallels.com/pa/6.0/doc/. | Open-Xchange APS Package requires an application host server to be set up before it can be successfully imported and used in OSA. This endpoint server can be provisioned as a VPS or a VM in the same infrastructure as OSA systems. Please make sure you have OSA (POA + PBA) infrastructure set up properly before continuing. The Provider’s guide for setting up OSA can be found at http://download.pa.parallels.com/pa/6.0/doc/. | ||
| − | You can either choose the automated endpoint deployment by using the endpoint.sh script file or use the manual installation process by continuing reading this chapter. For more information about automated endpoint deployment, please refer to https://doc.apsstandard.org/2.1/pa/deployment/#automated-setup-based-onendpoint-sh for instructions | + | You can either choose the automated endpoint deployment by using the endpoint.sh script file or use the manual installation process by continuing reading this chapter. For more information about automated endpoint deployment, please refer to https://doc.apsstandard.org/2.1/pa/deployment/#automated-setup-based-onendpoint-sh for instructions on how to download and use the script endpoint.sh. |
| − | sh. | ||
Please verify if the endpoint is compliant with the above-mentioned prerequisites. | Please verify if the endpoint is compliant with the above-mentioned prerequisites. | ||
| Line 145: | Line 186: | ||
#Copy the “scripts” folder to the folder where Apache is set up as Virtual Host: | #Copy the “scripts” folder to the folder where Apache is set up as Virtual Host: | ||
#:[root@endpoint~]# cp -R /root/Open-Xchange -[x.x-x]/scripts/ | #:[root@endpoint~]# cp -R /root/Open-Xchange -[x.x-x]/scripts/ | ||
| − | #:/var/www/html/ | + | #:/var/www/html/open-xchange |
| − | #Access ''/var/www/html/ | + | #Access ''/var/www/html/open-xchange''. |
#Ensure that the end-point is correctly deployed. | #Ensure that the end-point is correctly deployed. | ||
#:*Verify that the directory root exists and contains all project scripts. | #:*Verify that the directory root exists and contains all project scripts. | ||
| − | #:ll -aR /var/www/html/ | + | #:ll -aR /var/www/html/open-xchange |
#:*Verify that the .htaccess contains rewrite rules for all the application services | #:*Verify that the .htaccess contains rewrite rules for all the application services | ||
| − | #:cat /var/www/html/ | + | #:cat /var/www/html/open-xchange/.htaccess |
#The .htaccess file must be like: | #The .htaccess file must be like: | ||
#:Options +FollowSymLinks +ExecCGI | #:Options +FollowSymLinks +ExecCGI | ||
| Line 184: | Line 225: | ||
#:</IfModule> | #:</IfModule> | ||
#Set the user to Apache: | #Set the user to Apache: | ||
| − | #:chown -R apache:apache /var/www/html/ | + | #:chown -R apache:apache /var/www/html/open-xchange |
| − | + | #Check that the end-point has been installed successfully by visiting the endpoint’s URL in your browser: #:https://endpoint-ip-or-dns/openxchange/globals. | |
| − | |||
| − | #Check that the end-point has been installed successfully by visiting the endpoint’s URL in your browser: | ||
#:If you get the following error, the endpoint has been deployed successfully and the process finishes here. | #:If you get the following error, the endpoint has been deployed successfully and the process finishes here. | ||
#:{ "code": 500, "type": "Exception", "message": "APS-Instance-Id header not set." } | #:{ "code": 500, "type": "Exception", "message": "APS-Instance-Id header not set." } | ||
| Line 198: | Line 237: | ||
#:Set the AllowOverride All option for the folder that will be the parent of application endpoints. It is usually var/www/html in Apache. For example, in the /etc/httpd/conf/httpd.conf file, find the <Directory “var/www/html”> section and edit the following line. | #:Set the AllowOverride All option for the folder that will be the parent of application endpoints. It is usually var/www/html in Apache. For example, in the /etc/httpd/conf/httpd.conf file, find the <Directory “var/www/html”> section and edit the following line. | ||
#:AllowOverride All | #:AllowOverride All | ||
| − | #Restart the Apache service with the following command: service httpd | + | #Restart the Apache service with the following command: service httpd restart. |
| − | |||
=== Creating the crontab task in the Endpoint Host Server=== | === Creating the crontab task in the Endpoint Host Server=== | ||
This APS needs that a crontab task in order to execute periodical tasks. This steps has to be done in automatic and manual deployment. | This APS needs that a crontab task in order to execute periodical tasks. This steps has to be done in automatic and manual deployment. | ||
| − | |||
| − | |||
| − | |||
| − | |||
| − | |||
| − | |||
| − | |||
| − | |||
| − | |||
| − | |||
| − | |||
| − | |||
| − | |||
| − | |||
| − | |||
| − | |||
| − | |||
| − | |||
| − | |||
| − | |||
| − | |||
| − | |||
| − | |||
| − | |||
| − | |||
| − | |||
| − | |||
| − | |||
| − | |||
| − | |||
| − | |||
| − | |||
| − | |||
| − | |||
| − | |||
| − | |||
| − | |||
| − | |||
| − | |||
| − | |||
| − | |||
| − | |||
| − | |||
| − | |||
| − | |||
| − | |||
| − | |||
| − | |||
| − | |||
| − | |||
| − | |||
| − | |||
| − | |||
| − | |||
| − | |||
| − | |||
| − | |||
| − | |||
| − | |||
| − | |||
| − | |||
| − | |||
| − | |||
| − | |||
| − | |||
| − | |||
| − | |||
| − | |||
| − | |||
| − | |||
| − | |||
| − | |||
| − | |||
| − | |||
| − | |||
| − | |||
| − | |||
| − | |||
| − | |||
| − | |||
| − | |||
| − | |||
| − | |||
| − | |||
| − | |||
| − | |||
| − | |||
| − | |||
| − | |||
| − | |||
| − | |||
| − | |||
| − | |||
| − | |||
| − | |||
| − | |||
| − | |||
| − | |||
| − | |||
| − | |||
| − | |||
| − | |||
| − | |||
| − | |||
| − | |||
| − | |||
| − | |||
| − | |||
| − | |||
| − | |||
| − | |||
| − | |||
| − | |||
| − | |||
| − | |||
| − | |||
| − | |||
| − | |||
| − | |||
| − | |||
| − | |||
| − | |||
| − | |||
| − | |||
| − | |||
| − | |||
| − | |||
| − | |||
| − | |||
| − | |||
| − | |||
| − | |||
| − | |||
| − | |||
| − | |||
| − | |||
| − | |||
| − | |||
| − | |||
| − | |||
| − | |||
| − | |||
| − | |||
| − | |||
| − | |||
| − | |||
| − | |||
| − | |||
| − | |||
| − | |||
| − | |||
| − | |||
| − | |||
| − | |||
| − | |||
| − | |||
| − | |||
| − | |||
| − | |||
| − | |||
| − | |||
| − | |||
| − | |||
| − | |||
| − | |||
| − | |||
| − | |||
| − | |||
| − | |||
| − | |||
| − | |||
| − | |||
| − | |||
| − | |||
| − | |||
| − | |||
| − | |||
| − | |||
| − | |||
| − | |||
| − | |||
| − | |||
| − | |||
| − | |||
| − | |||
| − | |||
| − | |||
| − | |||
| − | |||
| − | |||
| − | |||
| − | |||
| − | |||
| − | |||
| − | |||
| − | |||
| − | |||
| − | |||
| − | |||
| − | |||
| − | |||
| − | |||
| − | |||
| − | |||
| − | |||
| − | |||
| − | |||
| − | |||
| − | |||
| − | |||
| − | |||
| − | |||
| − | |||
| − | |||
| − | |||
| − | |||
| − | |||
| − | |||
| − | |||
| − | |||
| − | |||
| − | |||
| − | |||
| − | |||
| − | |||
| − | |||
| − | |||
| − | |||
| − | |||
| − | |||
| − | |||
| − | |||
| − | |||
| − | |||
| − | |||
| − | |||
| − | |||
| − | |||
| − | |||
| − | |||
| − | |||
| − | |||
| − | |||
| − | |||
| − | |||
| − | |||
| − | |||
| − | |||
| − | |||
| − | |||
| − | |||
| − | |||
| − | |||
| − | |||
| − | |||
| − | |||
| − | |||
| − | |||
| − | |||
| − | |||
| − | |||
| − | |||
| − | |||
| − | |||
| − | |||
| − | |||
| − | |||
| − | |||
| − | |||
| − | |||
| − | |||
| − | |||
| − | |||
| − | |||
| − | |||
| − | |||
| − | |||
| − | |||
| − | |||
| − | |||
| − | |||
| − | |||
| − | |||
| − | |||
| − | |||
| − | |||
| − | |||
| − | |||
| − | |||
| − | |||
| − | |||
| − | |||
| − | |||
| − | |||
| − | |||
| − | |||
| − | |||
| − | |||
| − | |||
| − | |||
| − | |||
| − | |||
| − | |||
| − | |||
| − | |||
| − | |||
| − | |||
| − | |||
| − | |||
| − | |||
| − | |||
| − | |||
| − | |||
| − | |||
| − | |||
| − | |||
| − | |||
| − | |||
| − | |||
| − | |||
| − | |||
| − | |||
| − | |||
| − | |||
| − | |||
| − | |||
| − | |||
| − | |||
| − | |||
| − | |||
| − | |||
| − | |||
| − | |||
| − | |||
| − | |||
| − | |||
| − | |||
| − | |||
| − | |||
| − | |||
| − | |||
| − | |||
| − | |||
| − | |||
| − | |||
| − | |||
| − | |||
| − | |||
| − | |||
| − | |||
| − | |||
| − | |||
| − | |||
| − | |||
| − | |||
| − | |||
| − | |||
| − | |||
| − | |||
| − | |||
| − | |||
| − | |||
| − | |||
| − | |||
| − | |||
| − | |||
| − | |||
| − | |||
| − | |||
| − | |||
| − | |||
| − | |||
| − | |||
| − | |||
| − | |||
| − | |||
| − | |||
| − | |||
| − | |||
| − | |||
| − | |||
| − | |||
| − | |||
| − | |||
| − | |||
| − | |||
| − | |||
| − | |||
| − | |||
| − | |||
| − | |||
| − | |||
| − | |||
| − | |||
| − | |||
| − | |||
| − | |||
| − | |||
| − | |||
| − | |||
| − | |||
| − | |||
| − | |||
| − | |||
| − | |||
| − | |||
| − | |||
| − | |||
| − | |||
| − | |||
| − | |||
| − | + | *Set the crontab in order to execute periodical tasks | |
| − | + | *Open the crontab | |
| − | |||
| − | |||
| − | |||
| − | |||
| − | |||
| − | |||
| − | + | [root@endpoint~]# crontab -e | |
| − | # | ||
| − | |||
| − | |||
| − | |||
| − | |||
| − | |||
| − | |||
| − | + | *Set the crontab and save | |
| − | |||
| − | |||
| − | |||
| − | |||
| − | |||
| − | |||
| − | |||
| − | + | */30 * * * * cd /var/www/html/open-xchange; /usr/bin/php cronjob.php | |
| − | |||
| − | |||
| − | |||
| − | |||
| − | |||
| − | |||
| − | |||
| − | + | == Deploying the Open-Xchange APS Package== | |
| − | |||
| − | |||
| − | |||
| − | |||
| − | |||
| − | |||
| − | |||
| − | + | To deploy the Open-Xchange APS package on the provisioning host, you need to prepare the host and then import your Open-Xchange APS package in OSA. Find information about how to do it in this chapter. | |
| − | + | === Importing Open-Xchange Application === | |
| − | |||
| − | |||
| − | |||
| − | |||
| − | |||
| − | |||
| − | + | To import the Open-Xchange application to POA: | |
| − | # In the POA | + | #Log in as a service provider administrator. |
| − | # Click | + | #In the POA Control Panel, navigate to Services>Applications. |
| − | # | + | # Click Import Package, in the APS Packages tab. [[Image:aps_package_import.jpg]] |
| − | + | #Upload the package zip file from your local workstation to the POA environment. Select local file and browse for the correct application file. In this case Open-Xchange-[x.x-x].app.zip. | |
| − | # | + | #Click on Submit to upload the file. |
| − | # | + | #Click the Refresh icon, in the upper right corner, to check that the package has been uploaded. |
| − | # | + | #The package will successfully uploaded once you see the icon next to the package name. [[Image:aps_ox_package_available.jpg]] |
| − | # Click | + | #Click on Open-Xchange to create a new instance. |
| − | # | + | #Go to the Instances tab. |
| − | # | + | #Click Install. |
| − | # | + | #Type the Application API end-point URI: ''https://endpoint-ip-or-dns/open-xchange'' |
| − | + | #Click Finish, to confirm the creation of a new instance. | |
| − | |||
| − | # | ||
| − | |||
| − | |||
Latest revision as of 11:35, 17 June 2016
Contents
Deployment Guide for the OX as a Service APSv2 package into Odin Service Automation
This APS 2.0 package is only for the Open-Xchange own OXaaS platform or similar respective compatible deployments or copies of this platform. The package is designed for syndication and on-premise customers with Odin Service Automation 6.0.4 and higher.
This guide describes the integration for the OX as a Service APSv2 package into Odin Service Automation. This guide is intended for providers that use Odin Service Automation and want to sell Open-Xchange services to customers.
Terms and Abbreviations
Below is the list of concepts and abbreviations you will find in this page.
| Abbreviation | Definition |
| API | Application Programming Interface |
| APS | Application Packaging Standard, an open standard that was designed to simplify the delivery of SaaS applications in the cloud-computing industry. |
| HTTP | Hypertext Transfer Protocol |
| OSA | Odin Service Automation (former Parallels Automation), which includes both POA and PBA |
| PBA | Parallels Business Automation. |
| POA | Parallels Operations Automation. |
| SaaS | Software as a Service. |
| SSO | Single Sign-On. |
| URI | Uniform Resource Identifier |
| URL | Uniform Resource Locator |
| VM | Virtual Machine |
| VPS | Virtual Private Server |
Conventions
Below is the list of conventions you will find in this page.
| Abbreviation | Definition |
| Open-Xchange-xxxx.app.zip Package | Open-Xchange is the name of the package and xx-xx is the placeholder for a specific version of the APS |
| Foldername | Name of the folder where a specific file is located. In this case, “open-xchange” |
| https://endpoint-ip-or-dns | IP or URL of the environment |
Business Model Overview
About Open-Xchange
The standard business model of Open-Xchange consists of two major components: a platform fee and a revenue share. With the platform fee the customer pays the basic access to the hosted service or the software and it usually includes a certain amount of basic packages that are ideally distributed to a wide audience of users by bundling them into other products.
Technical Overview
This section contains an outline of how the integration of Open-Xchange and PA is performed and the list of Open-Xchange features that are supported within the integration package.
Supported Architecture and Requirements
The Principle of OSA & APS 2
The usual way that users use Odin, in order to get OX App Suite, is as follows:
- Open-Xchange published an APS 2 package into the Odin catalogue/ecosystem.
- Odin customers, and service resellers, see the package and want to resell OX App Suite.
- The service resellers downloads the APS 2 package and installs it into their OSA system
- The OSA system will ask for the location of a running and compliant OX App Suite System (This can be OXaaS or a compliant in-house OX App Suite System)
- The reseller can then sell OX App Suite accounts.
Compliant OX App Suite System
There are two options to connect an OX App Suite system:
- Use the OXaaS service that is provided by Open-Xchange
- Use an on-premise installation that includes a complete OX App Suite system, a Dovecot mail system and all the related services.
Use the standard recommend components together with provided configurations for:
- Apache
- Mysql
- Openldap (with a dedicated Open-Xchange schema)
- HAproxy
- Postfix
- S3 compatible Objectstore (as a file/email backend)
Please refer to following high level architecture diagram and if you have any questions please contact sales@open-xchange.com

Download
APS package
Download the APS package from the APS catalog: http://dev.apsstandard.org/apps/2.0/Open-Xchange/Open-Xchange/Mamasu/
Open-Xchange
Please contact Open-Xchange for further download and configuration information via info@open-xchange.com.
Integration Prerequisites
Before you start integrating Open-Xchange into OSA, learn about the necessary preparations for the process.
Prerequisites for the OSA Platform
The APS Package requires POA v6.0.4 or higher and OX App Suite 7.8.0 or higher.
PBA upsell APS must be enabled (to install it, follow this link: https://doc.apsstandard.org/2.1/pa/upsell/deploy/)
Prerequisites for the Endpoint
| Prerequisites | Notification code server |
| Description | Specific node with Apache and PHP used to install the system script. |
| Software |
|
Preparing the Endpoint Host Server
Open-Xchange APS Package requires an application host server to be set up before it can be successfully imported and used in OSA. This endpoint server can be provisioned as a VPS or a VM in the same infrastructure as OSA systems. Please make sure you have OSA (POA + PBA) infrastructure set up properly before continuing. The Provider’s guide for setting up OSA can be found at http://download.pa.parallels.com/pa/6.0/doc/.
You can either choose the automated endpoint deployment by using the endpoint.sh script file or use the manual installation process by continuing reading this chapter. For more information about automated endpoint deployment, please refer to https://doc.apsstandard.org/2.1/pa/deployment/#automated-setup-based-onendpoint-sh for instructions on how to download and use the script endpoint.sh.
Please verify if the endpoint is compliant with the above-mentioned prerequisites.
These deployment instructions are based on the fresh installation of CentOS 6. All required packages are installed and managed by its yum package manager.
Before carrying out the steps described below, you must have:
- Server path
- Credentials: ID and password
- Install PHP interpreter via yum install PHP and Apache HTTP server via yum install httpd if your Linux distribution does not include them. Please check your installed version of PHP via:
- [root@endpoint ~]# php -version
- And ensure your Apache HTTP server is up and running:
- [root@endpoint ~]# service httpd status
- The answer should be:
- httpd (pid 5749) is running...
- The default document root directory for Apache HTTP Server is located at /var/www/html/.
- The application host server requires the APS PHP Runtime library. Check if you have installed the appropriate version by using the following command:
- [root@endpoint~]# rpm –qa | grep aps
- Otherwise, it can be downloaded from http://doc.apsstandard.org/tools/php_lib/.
- If you need to copy files from different servers, we recommend using an FTP client.
- If you have an older version installed, execute the command below:
- [root@endpoint~]# rpm -Uvh aps-php-runtime-{version}.noarch.rpm
- If you do not have PHP runtime installed on your server, do the following:
- [root@endpoint~]# rpm -ivh aps-php-runtime-{version}.noarch.rpm
- Where aps-php-runtime-{version}.noarch.rpm is the name of the PHP runtime library, and {version} is the version number you download from the above link. After the installation, the /usr/share/aps/php directory will be added to the system php.ini file automatically.
- Create a new folder under /root/
- [root@endpoint~]# mkdir /root/Open-Xchange-[x.x-x]
- Upload the APS package zip file on your application endpoint. This guide assumes you place it under /root/Open-Xchange-[x.x-x]/Open-Xchange-[x.x-x].app.zip. If you need to copy files from different servers, we recommend using an FTP client.
- Move to folder /root/Open-Xchange-[x.x-x]
- [root@endpoint~]# cd /root/Open-Xchange-[x.x-x]
- Unzip the uploaded zip Open-Xchange-[x.x-x].app.zip
- [root@endpoint~]# unzip Open-Xchange-[x.x-x].app.zip
- Copy the “scripts” folder to the folder where Apache is set up as Virtual Host:
- [root@endpoint~]# cp -R /root/Open-Xchange -[x.x-x]/scripts/
- /var/www/html/open-xchange
- Access /var/www/html/open-xchange.
- Ensure that the end-point is correctly deployed.
- Verify that the directory root exists and contains all project scripts.
- ll -aR /var/www/html/open-xchange
- Verify that the .htaccess contains rewrite rules for all the application services
- cat /var/www/html/open-xchange/.htaccess
- The .htaccess file must be like:
- Options +FollowSymLinks +ExecCGI
- <IfModule mod_rewrite.c>
- RewriteEngine On
- RewriteBase /openxchange
- RewriteCond %{REQUEST_FILENAME} !-f
- RewriteCond %{REQUEST_URI} !=/favicon.ico
- RewriteRule ^brand(|/.*)$ brand.php?q=$1 [L,QSA]
- RewriteRule ^domain(|/.*)$ domain.php?q=$1 [L,QSA]
- RewriteRule ^emailaddress(|/.*)$ emailaddress.php?q=$1
- [L,QSA]
- RewriteRule ^globals(|/.*)$ globals.php?q=$1 [L,QSA]
- RewriteRule ^group(|/.*)$ group.php?q=$1 [L,QSA]
- RewriteRule ^profile(|/.*)$ profile.php?q=$1 [L,QSA]
- RewriteRule ^purchaserequest(|/.*)$ purchaserequest.php?q=$1
- [L,QSA]
- RewriteRule ^resource(|/.*)$ resource.php?q=$1 [L,QSA]
- RewriteRule ^subdomain(|/.*)$ subdomain.php?q=$1 [L,QSA]
- RewriteRule ^shareddomain(|/.*)$ shareddomain.php?q=$1
- [L,QSA]
- RewriteRule ^sharedsubdomain(|/.*)$ sharedsubdomain.php?q=$1
- [L,QSA]
- RewriteRule ^tenant(|/.*)$ tenant.php?q=$1 [L,QSA]
- RewriteRule ^user(|/.*)$ user.php?q=$1 [L,QSA]
- RewriteRule ^cron(|/.*)$ cron.php?q=$1 [L,QSA]
- RewriteRule ^crontask(|/.*)$ crontask.php?q=$1 [L,QSA]
- RewriteRule ^api/createrequest(|/.*)?$
- api.php?call=createrequest [L,QSA]
- RewriteRule ^api/getupsellresources/([a-zA-Z0-9/@/.]+)?$
- api.php?call=getupsellresources&login=$1 [L,QSA]
- </IfModule>
- Set the user to Apache:
- chown -R apache:apache /var/www/html/open-xchange
- Check that the end-point has been installed successfully by visiting the endpoint’s URL in your browser: #:https://endpoint-ip-or-dns/openxchange/globals.
- If you get the following error, the endpoint has been deployed successfully and the process finishes here.
- { "code": 500, "type": "Exception", "message": "APS-Instance-Id header not set." }
- If you get the following one, please see the instructions below.
- {
- "code": 404,
- "type": "RuntimeException",
- "message": "Not Found: No appropriate method found for url…"
- }
- Set the AllowOverride All option for the folder that will be the parent of application endpoints. It is usually var/www/html in Apache. For example, in the /etc/httpd/conf/httpd.conf file, find the <Directory “var/www/html”> section and edit the following line.
- AllowOverride All
- Restart the Apache service with the following command: service httpd restart.
Creating the crontab task in the Endpoint Host Server
This APS needs that a crontab task in order to execute periodical tasks. This steps has to be done in automatic and manual deployment.
- Set the crontab in order to execute periodical tasks
- Open the crontab
[root@endpoint~]# crontab -e
- Set the crontab and save
*/30 * * * * cd /var/www/html/open-xchange; /usr/bin/php cronjob.php
Deploying the Open-Xchange APS Package
To deploy the Open-Xchange APS package on the provisioning host, you need to prepare the host and then import your Open-Xchange APS package in OSA. Find information about how to do it in this chapter.
Importing Open-Xchange Application
To import the Open-Xchange application to POA:
- Log in as a service provider administrator.
- In the POA Control Panel, navigate to Services>Applications.
- Click Import Package, in the APS Packages tab.
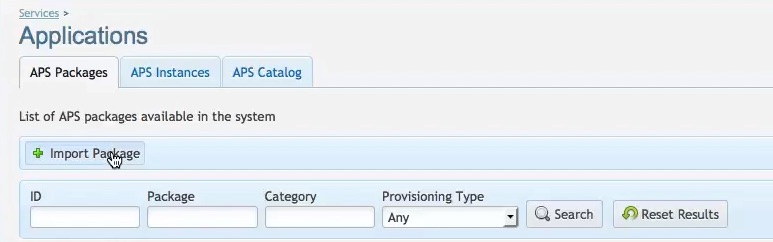
- Upload the package zip file from your local workstation to the POA environment. Select local file and browse for the correct application file. In this case Open-Xchange-[x.x-x].app.zip.
- Click on Submit to upload the file.
- Click the Refresh icon, in the upper right corner, to check that the package has been uploaded.
- The package will successfully uploaded once you see the icon next to the package name.
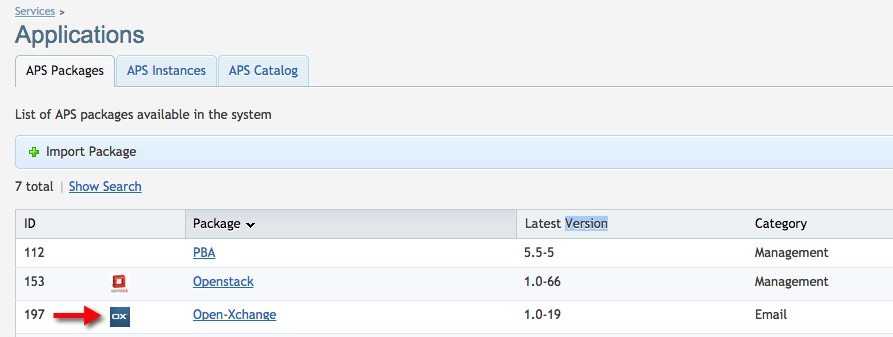
- Click on Open-Xchange to create a new instance.
- Go to the Instances tab.
- Click Install.
- Type the Application API end-point URI: https://endpoint-ip-or-dns/open-xchange
- Click Finish, to confirm the creation of a new instance.

